DIY Tutorials - Matching Formal Outfits for the Entire Family
This year when Chris asked what I wanted for my birthday I said "One day, all to myself - no kids, no responsibilities." The amazing husband he is, he took the kids and I had 8 hrs to myself. What did I do?! I sewed for 8 hrs - straight, because I'm crazy like.
Well, there was some reason behind my sewing madness.
We had a road trip to Monterey and Sequoia National Park coming up. During our trip we would be attending a wedding. A few weeks before our trip my husband mentioned "This might be one of the few times we get dressed up really nice as a family. We should try to coordinate somehow." There it was - my mission.
To created a mission for myself within these parameters :
- Make at least one item for everyone in my family
- Use only materials I already owned
- Complete within 1 week
Let's see how I did...
Materials:
- My inspiration started with a remnant piece of blue lace I found at a fabric rummage sale. I bought it on a whim (like many purchases at a rummage sale) without a clue what I would make with it.
- The dark grey for the ties are denim from my stockpile of fabric. (I am a fabric hoarder - don't judge.)
- The white on the ties and dress is bias tape I got from the thrift store years ago. I remember seeing this giant bag of bias tape that looked super dated but had lots of potential. It wasn't until this project that I finally taught myself how to properly use bias tape. As with most things sewing, at first I was pretty intimidated but then once I took the time to learn, I became hooked. Needless to say, me and bias tape are BFF's now.


I made Zoey's dress first, which is when I learned to sew bias tape. I followed this tutorial which I adjusted a bit to accommodate for the lace. For the body, I used a light grey cotton underneath the lace. The sleeves are a single layer of lace with bias tape around the edge. I added bias tape the bottom hem to match the sleeves as well. I can't get enough of her in this sweet dress. This took me roughly 3 hrs from start to finish.


Next, I made 2 ties using a pattern from one of my fave bloggers. I wasn't sure how/if the delicate lace fabric would work but it turned out pretty stinkin' sweet. I added bias tape to the top of the lace as a solution to hide the imperfect edge and it actually makes the tie look so much more polished and AWESOME. I really liked Zoey's dress, but after I made these, I was stoked. These took roughly 2.5 hrs from start to finish.

Last but not least, I made a simple skirt for myself. I didn't use a pattern for this. As shown below, I used this existing grey skirt as the layer underneath the lace. The waist folds over, so I sewed the bottom edge of the fold to the lace skirt I made. I didn't cut the fabric wide enough so I added this strip of ribbon about half way down, creating a sleek little slit. I find myself improvising a lot when I make mistakes and often times, it works out better. In this case, I don't love this detail but it's better than wearing it tight and possibly ripping it. I wore the slit toward the back, but it can easily be worn on the side as well. This took about 2.5 hrs total.


There you have it. Mission ACCOMPLISHED! Could not be any more thrilled with how everything came together. I love it when I take the time to #CREATEmore.


Zoey loves putting "high shoes" on any chance she gets.

Surfs up!


I hope this inspires you to #CREATEmore matching outfits for you and your lovies. I would love to hear what you think of these and see your own creations!
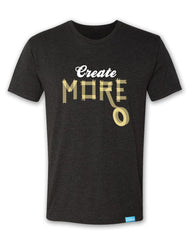
If you're a creative soul like me, you'll love our collection of Create More shirts. 10% of net profits will benefit organizations that empower underprivileged youth. Learn more about our mission to Be The Good.


