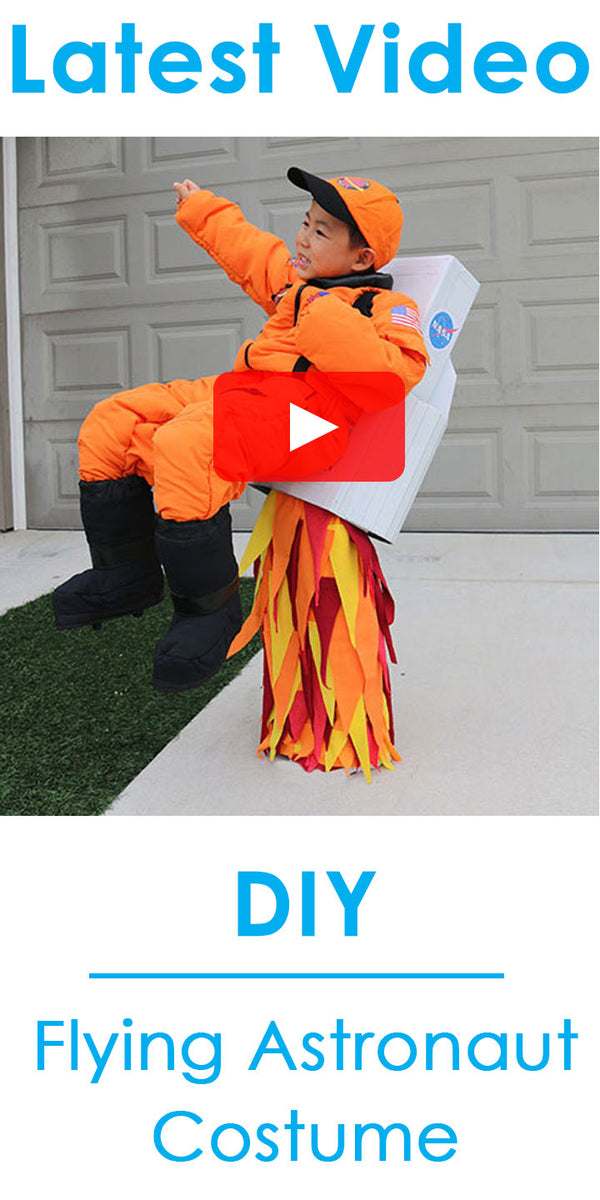
Halloween 2017 - DIY Video Tutorial - How to Make a Fidget Spinner Costume - Includes FREE Pattern
(Note: Some links in this post are affiliate links, and we will be compensated when you make a purchase by clicking through our links. Read our disclosure policy here.)
It's crazy to think this marks our 10th year of making DIY Halloween costumes! Each year, I love looking back at our past costumes. It's definitely a fun way to watch our family grow. This is one family tradition that I hope we never outgrow.
Some of our favorite costumes have also been some of the silliest. This year takes the cake on the silliest yet. If you have a kid (or even if you don't) I am sure you've heard of the fidget spinner. Well, we thought it would only be appropriate to make it our theme for this year. The best part is, they actually spin!

This costume is super straight forward to make, especially using this FREE pattern I created. Sign up and we'll send an email with the pattern. Be sure to add madebyizzaroo@gmail.com to your contacts. If you don't see the email after a few minutes, be sure to check your promotions or junk folder.
Materials needed to make fidget spinner:
- Fidget spinner pattern
-
Large piece of cardboard
-
Wooden Spool
-
Nylon Webbing
-
Rubber Bands
-
Hot glue gun
-
Velcro
Optional materials need to decorate:
-
Mirror Boards
-
Super 77 Spray Mount Adhesive
-
Spray paint
-
Cricut Explore Cutting Machine
-
LED Diode Lights
-
CR2032 3 Volt Lithium Coin Battery
-
Electrical Tape
Video Tutorial:
Step by step Instructions:
Select your desired size fidget spinner:
- Small = 15 inch diameter
- Medium = 20 inch diameter
- Large = 25 inch diameter
Cut the pieces for the fidget spinner using this free pattern.
Assemble pattern and use it to cut the fidget spinner out of Large piece of cardboard.

Use circle templates from pattern to cut 2 circle cardboard pieces and 3 mirror board pieces.


Now it's time to decorate your fidget spinner. For ours, we printed images and tiled them on using Super 77 Spray Mount Adhesive. We also printed images for the center cardboard pieces and spray mounted them on as well. From our experience, this brand of adhesive spray has the strongest hold.
Other ways to decorate are to draw directly on the cardboard, use Spray Paint or add vinyl stickers like I did using the Cricut Explore Cutting Machine
. I'll show that in more detail later.

Cut 1.5 inch circle from center of fidget spinner using template from pattern.

Insert spool through center of fidget spinner hole and wrap Rubber Bands on one side of Wooden Spool
.

Glue wooden spool to center of cardboard circle.

Wrap rubber bands on the other side of wooden spool. This will keep the fidget spinner from wobbling when spun.
Glue second cardboard circle to the other end of wooden spool.

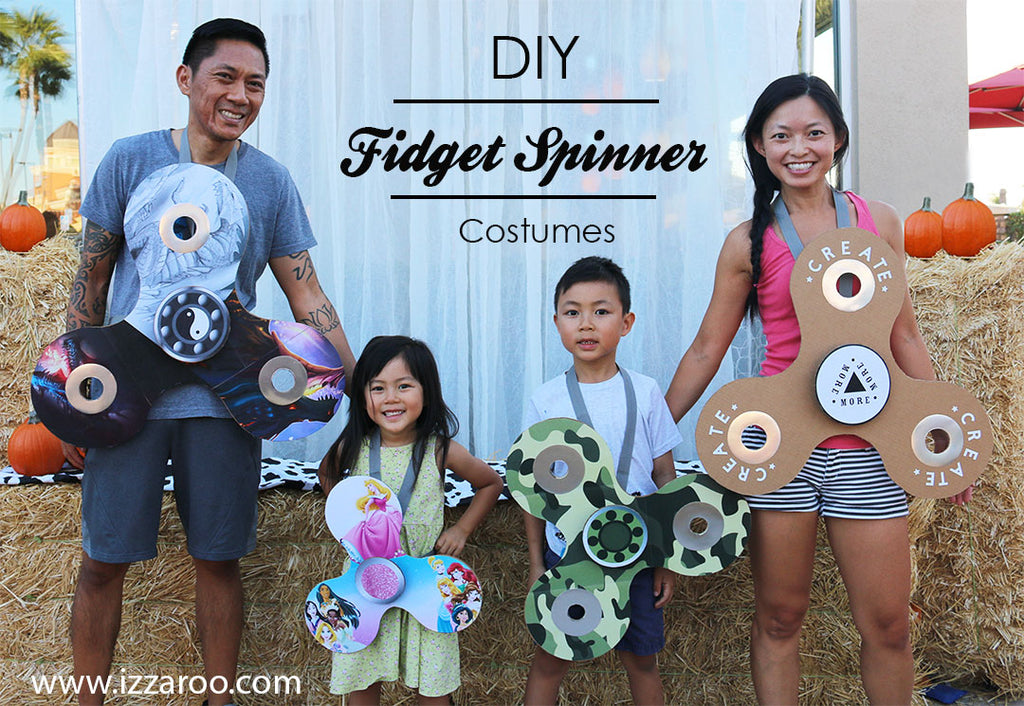
This is the 15 inch diameter fidget spinner costume. Since Zoey didn't want to cover any of her lovely princesses, we didn't add mirror boards to her spinner.

Zander's camo fidget spinner is 20 inches in diameter.
Attach 3 Mirror Board circles in place using tape. Cut out inner circle from cardboard fidget spinner.

Chris' dragon fidget spinner is 25 inches in diameter.

I decorated mine using mirror boards and vinyl stickers I cut with my Cricut Explore Cutting Machine.

The Cricut Explore Cutting Machine does an amazing job of cutting intricate details on vinyl and other materials, too.


Turn your fidget spinner over and cut 3 slits into the back cardboard circle.

The top slit is for the Nylon Webbing which will wrap around the neck. The two side slits are for the waistband. Measure and cut nylon to desired length, then use a safety pin to assist webbing through slit.


Be sure to melt the edges of the nylon webbing to keep it from fraying.

I sewed the ends of the neck piece together for a secure hold.

Sew on Velcro to secure the waistband.

To make these even more fun (if that's possible), we added 3 LED Diode Lights to each fidget spinner.

Here's a close up of what the LED Diode Lights look like and the CR2032 3 Volt Lithium Coin Battery
needed to make them work.

To add these to yours, simply poke 2 holes using a push pin.

Insert 2 prongs from light into the holes.

Insert the battery between the two prongs and cover with Electrical Tape.

There you have it. Your fidget spinner is ready for a spin!


If you make your own versions we'd love to see! Tag #IZZAROOcostumes for a chance to be featured on our website.
Hope this inspires you to #CREATEmore and make lasting memories for your family. I would love to hear what you think of these in the comments section.
See all our past Halloween costumes for more fun ideas.
To see some of our fun video tutorials, check out our YouTube channel.
If you love to create like us, you'll love our collection of Create More shirts. 10% of net profits will benefit organizations that empower underprivileged youth. Learn more about our mission to Be The Good.